Ok. You know I love me some glitter. Like, absolutely adore it without compare. This past weekend one of my friends from high school/college had her Bachelorette party. I wanted to do something thoughtful for her and so I put together a “Ready…Set…Bachelorette” kit with a couple other girls going to the event. The kit included themed “solo” cups, photo frame and signable mat, Bachelorette party drinking cards, light up bachelorette sash, tiara, veil, personalized shot glasses for each of the party go-ers, lidded cup and straw for the bride, and picture plaques so people could take before/after pictures [I’m sure these didn’t end up happeneing! lol].
Any-who. I didn’t have enough fore-sight to take pictures of everything but I did record the process for the glitter glasses. Here is the tutorial!
Supplies:
Painting tape/masking tape
Spray glitter paint
Spray clear lacquer
Shot glasses/shooter glasses [or whatever glasswear you’re committed to]
Paint Pens [safe for acrylic and glass]
Rhinestones on sticky surface [I got mine in the scrapbook section]
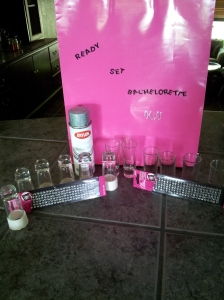
 This is what all the supplies look like lined up except for the clear lacquer and masking tape – but you can see where some glasses are taped off.
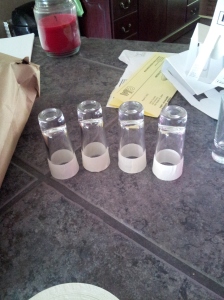
First thing you have to do is wash and dry the shot glasses completely. Then, take the masking tape and tape off whatever portion you DON”T want to have glittered. For me, it was the very top.
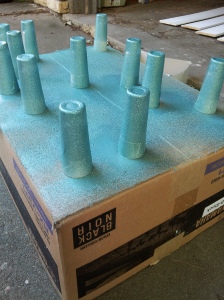
So after you tape off your glasses put them upside down on an old box and make sure to put that on top of a plastic tarp so you don’t glitter your driveway [a mistake that I made that caused Ben some stress.] Once you’re all set shake your glitter paint and spray away!
 The paint needs about 20 minutes to dry. For me, I took that time to go do Insanity. I paused halfway through to apply a second coat – I wanted them GOOD and glittery and then went back to finish my workout. After the glasses are done drying bring them back to your in-house workspace and take the masking tape off of the glasses.
 The next step is to apply the rhinestone stickies to your glass. I wanted mine to line up with the glitter line. so I applied them there. Feel free to use acrylic glue or glass-safe glue if you are concerned about your rhinestones sticking. I wasn’t.
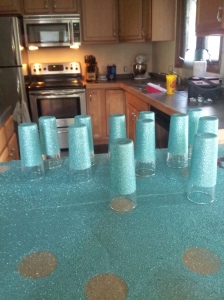
Once you’re done with the rhinestones take your paint pen and write the name of each party go-er on the glass. After you’ve finished that, put the glasses back on your paint-safe-zone and then spray them over with the clear lacquer. This will make them hand-washable. The above picture is the finished product. The clear lacquer gives the cups a really cool effect in that it makes them a little cloudy. I dug it.
Let them dry overnight and then pack them up and take them with you. The whole project was super easy, lots of fun and ended with GLITTER! how can you be mad?
Note: I had leftover glitter spray so I actually sprayed a bottle of Kate’s favorite vodka with the glitter spray and then the lacquer so she had a sparkly bottle to go with the awesomely sparkly glasses. It was a hit!
